Make PO payments from the "Suppliers / Purchase Orders" menu.
Step narrative.
Detail.
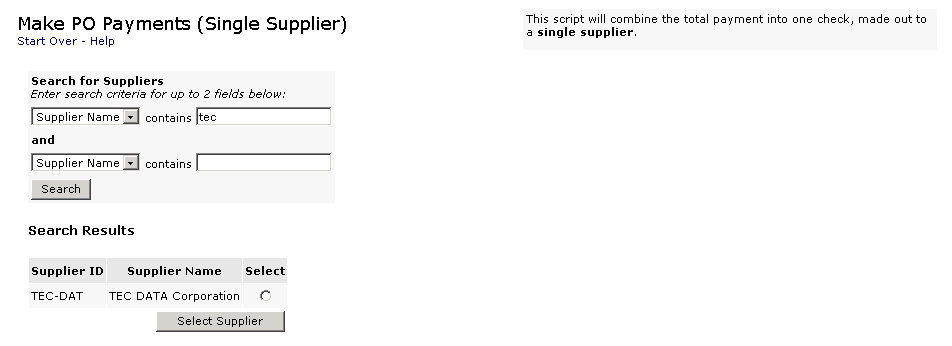
If you have a long suppliers list, you can limit the output by selecting the "supplier ID" or "supplier Name" and entering few known characters in the "contains" filed in the "Search for Suppliers" input screen. In the example below the user selected "supplier Name" contains the characters "tec". If there were many suppliers with "tec" in their name the second field could be used with the word "data" in the contains field to narrow the search to TECH DATA. If there were no criteria entered, a complete list of suppliers would be returned upon clicking on the "Search" button. In either case the "Search Results" screen bellow provides for selecting the supplier by clicking the "select" radio button on the corresponding supplier. Upon selection of the supplier, the name will shows up in the middle of "Search for Purchase orders" screen.

2. Select one or more invoices to pay.
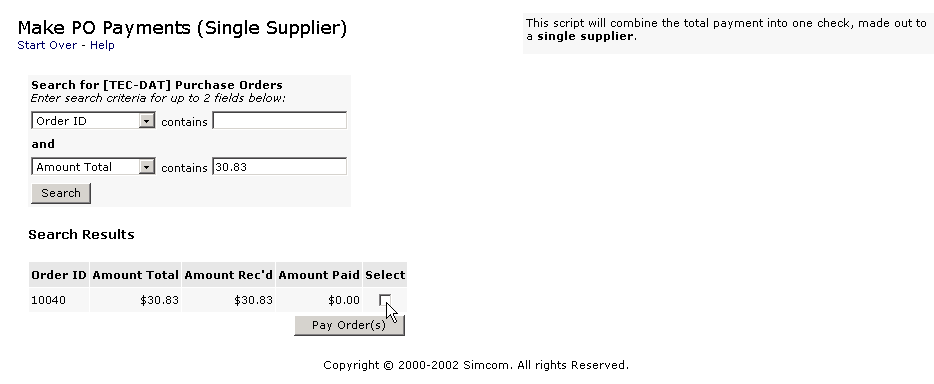
In this single supplier mode one could pay all or selected outstanding orders. The total of multiple invoices will be included in one check. In the example bellow the search criteria entered "Amount Total " "contains" field ($30.83) returned one order.
If there were no criteria entered, all outstanding orders would be listed in the "Search Results" and the user could select one or more for payment by clicking on the corresponding box, under "Select" column. In either case the confirmation screen will appear following a click on the "Pay Order(s)" button.
Enter a check mark in the box and the click "Pay orders" button.
The following screen will show 
The confirmation screen will list all orders selected in order of "ID" confirming payment amount for every order. If any of the amounts are incorrect the process can be cancelled at this point. If the Order totals are correct and you want to proceed with payment click OK for the next step.

.
4. Entering a check number and selecting a bank account.
As the last step in the process enter the check number and the bank account (if more than one bank is used to draw funds).

. Click on the "OK" button to produce the check bellow.
Traditionally checks are printed via a program that controls the output to fall within predefined boxes in a form. A web based program doesn't provide good printing accuracy. The output below is produced by Microsoft internet explorer based on a 800 by 600 resolution. One could make preprinted bank checks, to match the the dollar and payee outputs of the form, for an one step check print process without modifying the check form. To print on pre-design bank checks one could modify the check form output by cutting and pasting the output to MS word or MS Excel. Both of these and other programs available in the market allow the user to format the output to fit any form.
. 